Debugging Smart Contracts with Visual Studio Code
Debugging smart contracts is made possible with the integrated debugger in Visual Studio Code. You can debug your contract just like you would debug a regular program.
Prerequisites
Before proceeding with this tutorial, make sure you have the following:
- Visual Studio Code
- The rust-analyser extension.
- The CodeLLDB extension.
- A Rust test
If you want to follow along, you can clone the klever-sdk-rs repository and use the crowdfunding-kda example.
Step-by-Step Debugging
In VSCode, you can set breakpoints anywhere in your code by clicking to the left of the line number. A red dot will appear to mark the breakpoint as registered by the environment:

Once you've set a breakpoint, you can debug your test function by clicking the Debug button above the test function name:

If it doesn't appear, you might need to wait for rust-analyser to load or ensure you've added the #[test] annotation.
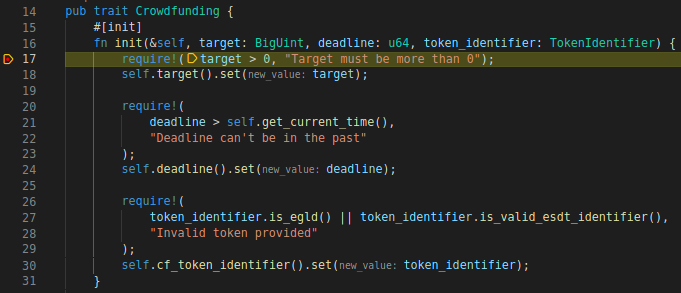
Once you've started the test, it should stop at the breakpoint and highlight the current line:

You can then use VSCode's step-by-step debugging (usually F10 to step over, F11 to step into, or Shift + F11 to step out).
Inspecting Variables
For basic Rust types like u64, you can simply hover over them to see their values.
However, for managed types, you won't see the actual data; instead, you'll see something like this:
handle:0
_phantom:{...}
To inspect managed types, use the sc_print! macro:
sc_print!("{}", target);
Adding this line to the beginning of the #[init] function will print 2000 in the console.
Printing Formatted Messages
If you want to print other data types, you can use the sc_print! macro as well. For example, in the #[init] function:
sc_print!(
    "I accept {}, a number of {}, and only until {}",
    token_identifier,
    target,
    deadline
);
This macro will print the following:
"I accept CROWD-123456, a number of 2000, and only until 604800"
Note: For ASCII or decimal representation, use {}, and for hexadecimal, use {:x}.